

Create a CI/CD Pipeline for your CDK App
by Thorsten Höger, Cloud Automation Evangelist
In the last post, we created a basic serverless application that was deployed into one prod environment. In this post, I will show you how to deploy your CDK application to multiple stages in multiple AWS accounts and regions to have real test environments before your code hits production.
Account Setup
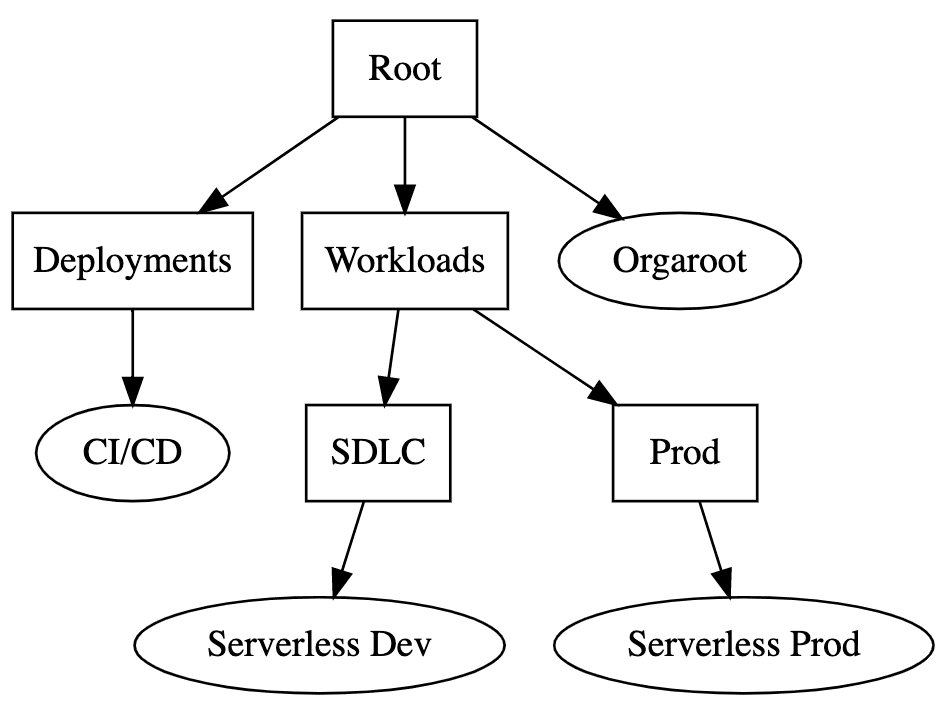 | Using AWS Organizations we create three AWS accounts:
For this blog post, we will refer to the accounts as "CI/CD" with account id 111111111111, "Serverless Dev" with id 222222222222, and "Serverless Prod" with id 333333333333. We will deploy environments to the Frankfurt and to the Dublin region. |
CDK bootstrapping
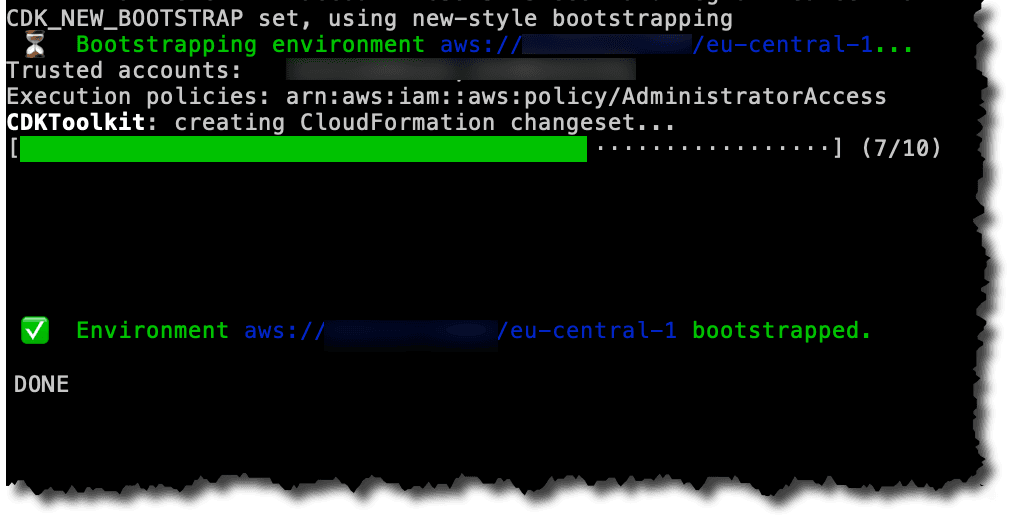
For CDK pipelines to work, we need to bootstrap all account/region pairs where we want to deploy something. Additionally, we need to bootstrap with the new bootstrap style.
To do this we log into each account and run the following commands:
# In CI/CD account
CDK_NEW_BOOTSTRAP=1 cdk bootstrap --bootstrap-customer-key --cloudformation-execution-policies 'arn:aws:iam::aws:policy/AdministratorAccess' aws://111111111111/eu-central-1
CDK_NEW_BOOTSTRAP=1 cdk bootstrap --bootstrap-customer-key --cloudformation-execution-policies 'arn:aws:iam::aws:policy/AdministratorAccess' aws://111111111111/eu-west-1

# In Dev account
CDK_NEW_BOOTSTRAP=1 cdk bootstrap --bootstrap-customer-key --cloudformation-execution-policies 'arn:aws:iam::aws:policy/AdministratorAccess' --trust 111111111111 aws://222222222222/eu-central-1
CDK_NEW_BOOTSTRAP=1 cdk bootstrap --bootstrap-customer-key --cloudformation-execution-policies 'arn:aws:iam::aws:policy/AdministratorAccess' --trust 111111111111 aws://222222222222/eu-west-1

# In Prod account
CDK_NEW_BOOTSTRAP=1 cdk bootstrap --bootstrap-customer-key --cloudformation-execution-policies 'arn:aws:iam::aws:policy/AdministratorAccess' --trust 111111111111 aws://333333333333/eu-central-1
CDK_NEW_BOOTSTRAP=1 cdk bootstrap --bootstrap-customer-key --cloudformation-execution-policies 'arn:aws:iam::aws:policy/AdministratorAccess' --trust 111111111111 aws://333333333333/eu-west-1
As you can see, we are bootstrapping both regions in all accounts, and for the workload accounts we are establishing a trust relationship to the CI/CD account to allow cross-account deployments. CDK Bootstrap will create deployment roles that will be assumed by the pipeline in the CI/CD account. All these roles will have full administrative permissions as we added the admin policy.
For my AWS org, I created a small Python helper script to bootstrap accounts. You can find it here https://gist.github.com/hoegertn/390f80857f745f3487ecbf2ffbef137b
Add pipeline
In our CDK application, we now need to make some changes. First, we need to create a CDK pipeline and then we need to add stages to our pipeline containing our serverless application. I will be using GitHub as the location of my repo so we also need a CodeSuite connection ARN we create using the web console.
We install the CDK pipeline library using npm install --save-exact @aws-cdk/pipelines
Now we need to modify our application inside the bin folder. Previously it looked like this:
#!/usr/bin/env node
import 'source-map-support/register';
import * as cdk from '@aws-cdk/core';
import { ServerlessDemoStack } from '../lib/serverless-demo-stack';

const app = new cdk.App();
new ServerlessDemoStack(app, 'cdk-serverless-demo', {
  env: {account: 'XXXX', region: 'eu-central-1'},
});
First we create a new Stack for the pipeline and reference our GitHub repo and secret.
class PipelineStack extends cdk.Stack {
  constructor(scope: cdk.Construct, id: string, props: cdk.StageProps) {
    super(scope, id, props);

    // Create the CDK pipeline
    const pipeline = new pipelines.CodePipeline(this, 'Pipeline', {
      pipelineName: 'ServerlessPipelineDemo',
      synth: new pipelines.ShellStep('Synth', {
        // Use a connection created using the AWS console to authenticate to GitHub
        // Other sources are available.
        input: CodePipelineSource.connection('taimos/cdk-serverless-demo-pipeline', 'main', {
          connectionArn: 'arn:aws:codestar-connections:us-east-1:222222222222:connection/abc', // Created using the AWS console
        }),
        commands: [
          'npm ci && npm ci --prefix lambda',
          'npx cdk synth',
        ],
      }),
    });
  }
}
Now we remove our application stack from the CDK app and replace it with our pipeline, as this will be the only stack in our app. It will then create our stages during the synthesize step.
const app = new cdk.App();
new PipelineStack(app, 'ServerlessPipelineDemo', {
  env: {account: '111111111111', region: 'eu-central-1'}
});
Deployment of the pipeline
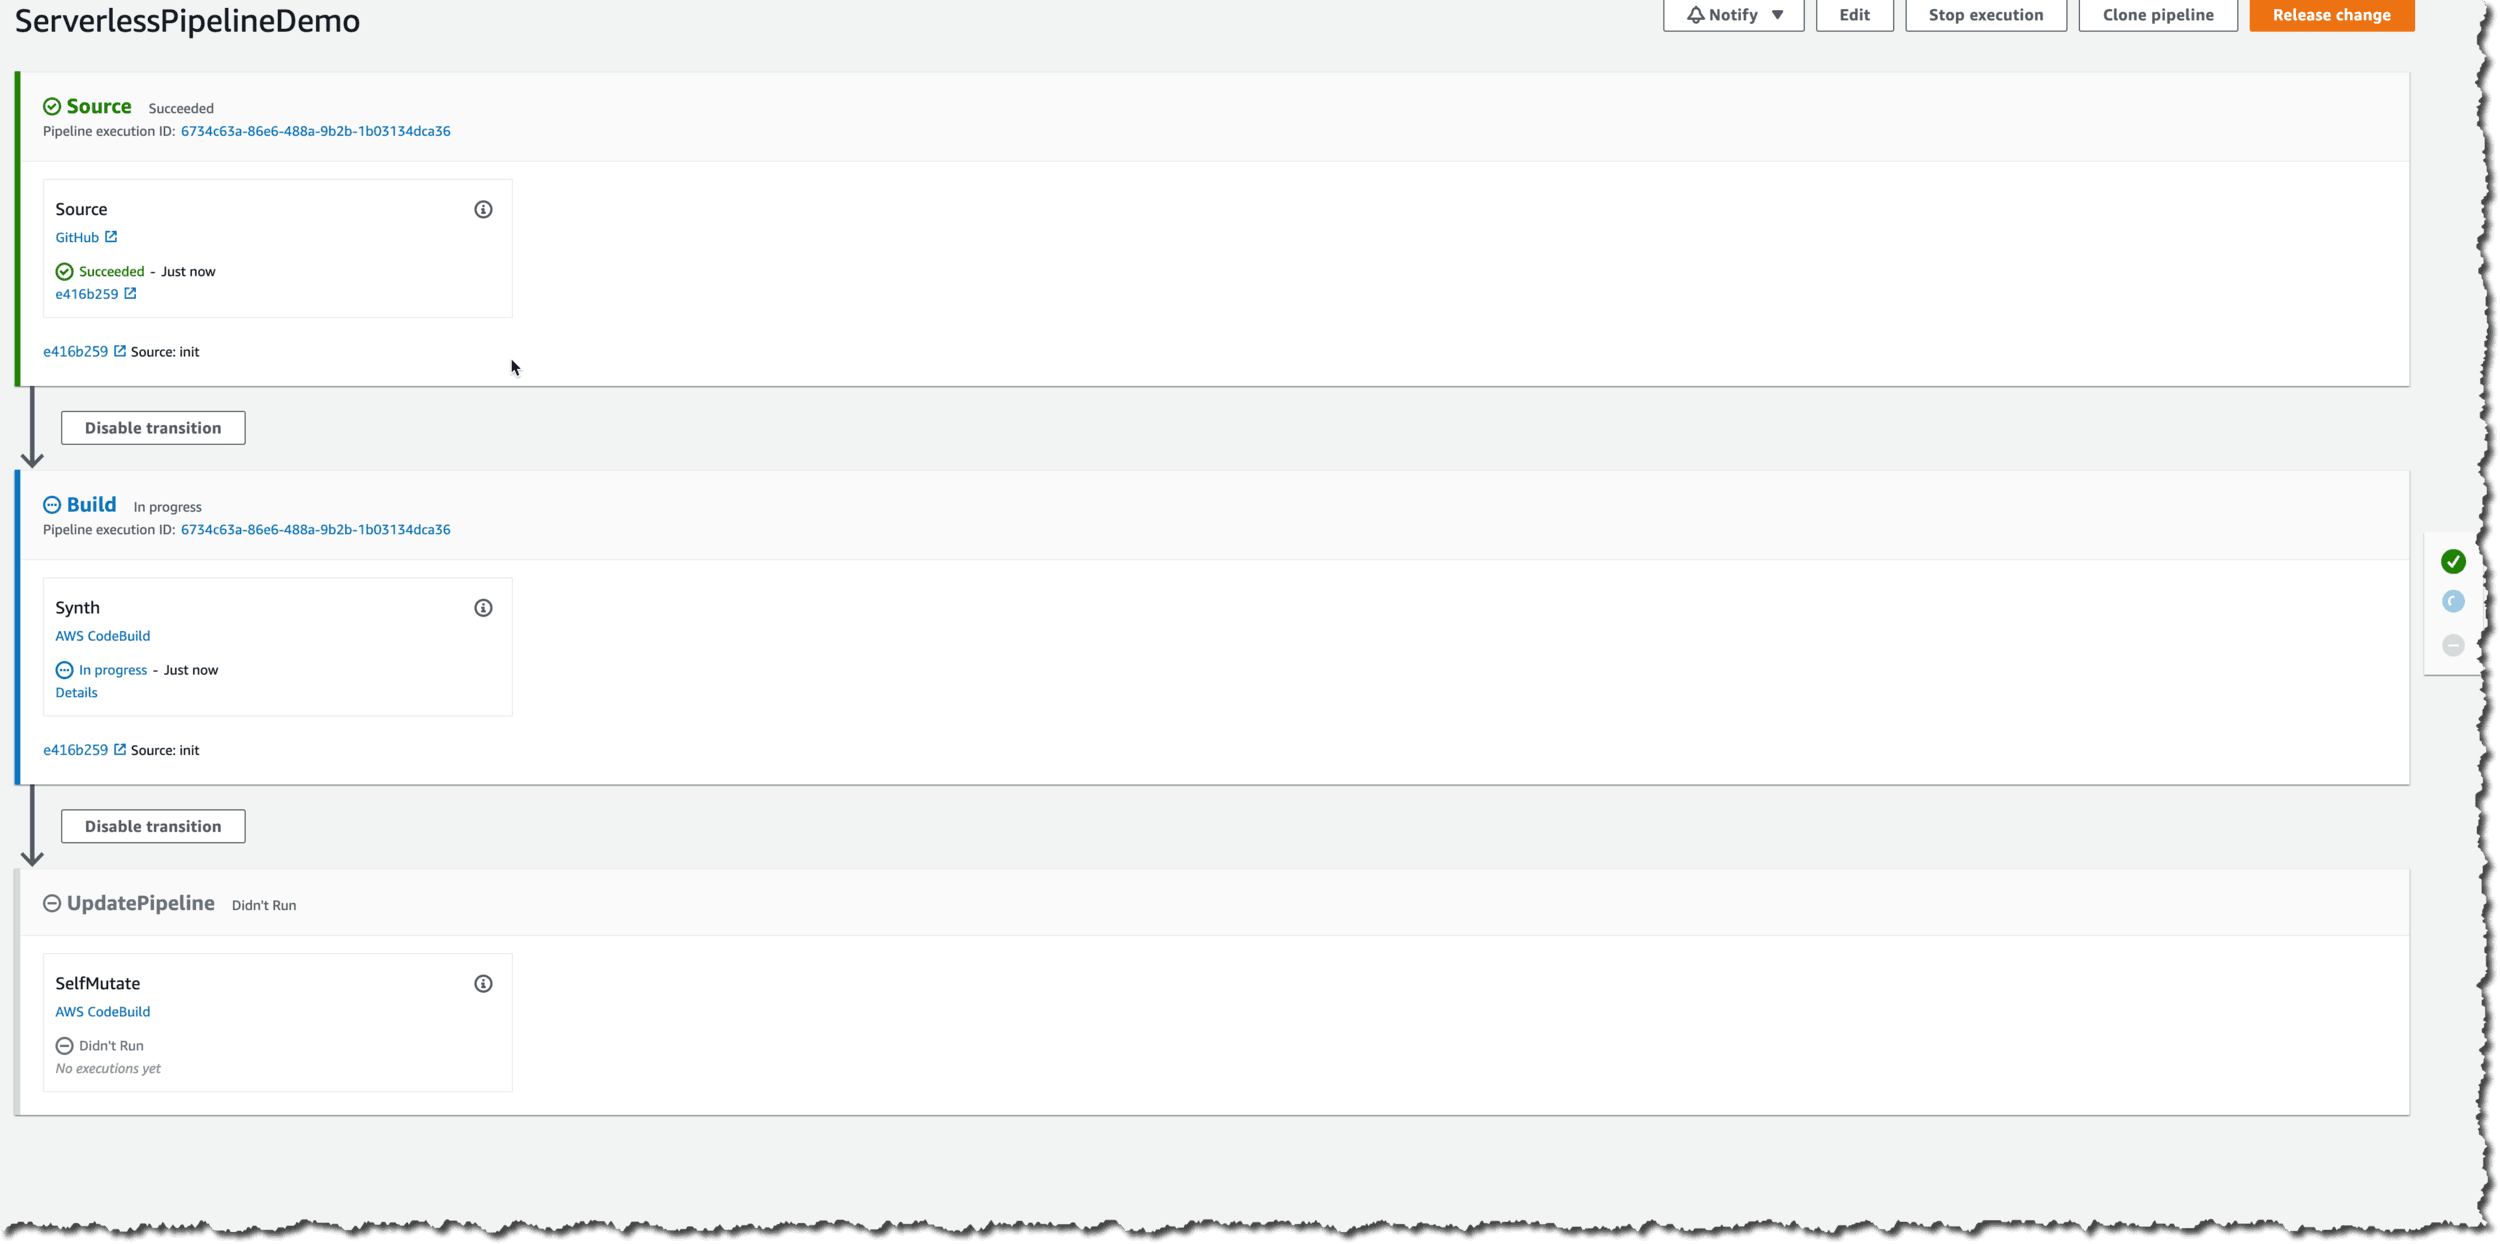
We should now commit our code to the repository and push it to our source. In my case, I pushed it to GitHub. Now we login to the CI/CD account and run cdk deploy ServerlessPipelineDemo manually once to set up the pipeline. All further updates will be done through the repository.
Please make sure to push before deploying the first time, as CodePipeline starts the first execution immediately and will fail if the repo is not yet there.
Adding application stages
For our serverless application, we now define one stage by creating a new class that extends the Stage class.
class AppStage extends cdk.Stage {
  constructor(scope: cdk.Construct, id: string, props: cdk.StageProps) {
    super(scope, id, props);
    new ServerlessDemoStack(this, 'cdk-serverless-demo');
  }
}
We can now use this stage definition inside our pipeline to add environments in our AWS accounts and regions. So inside our pipeline stack, right after the definition of the pipeline, we add:
pipeline.addStage(new AppStage(this, 'app-dev-fra', { env: { account: '222222222222', region: 'eu-central-1' } }));
pipeline.addStage(new AppStage(this, 'app-dev-dub', { env: { account: '222222222222', region: 'eu-west-1' } }));
pipeline.addStage(new AppStage(this, 'app-prod-fra', { env: { account: '333333333333', region: 'eu-central-1' } }));
pipeline.addStage(new AppStage(this, 'app-prod-dub', { env: { account: '333333333333', region: 'eu-west-1' } }));
We can now commit and push these changes and the pipeline will pickup this commit and start a new execution. The moment it reaches the UpdatePipeline Stage it will self mutate and restart the pipeline to add the additional stages for assets, deployments, etc.
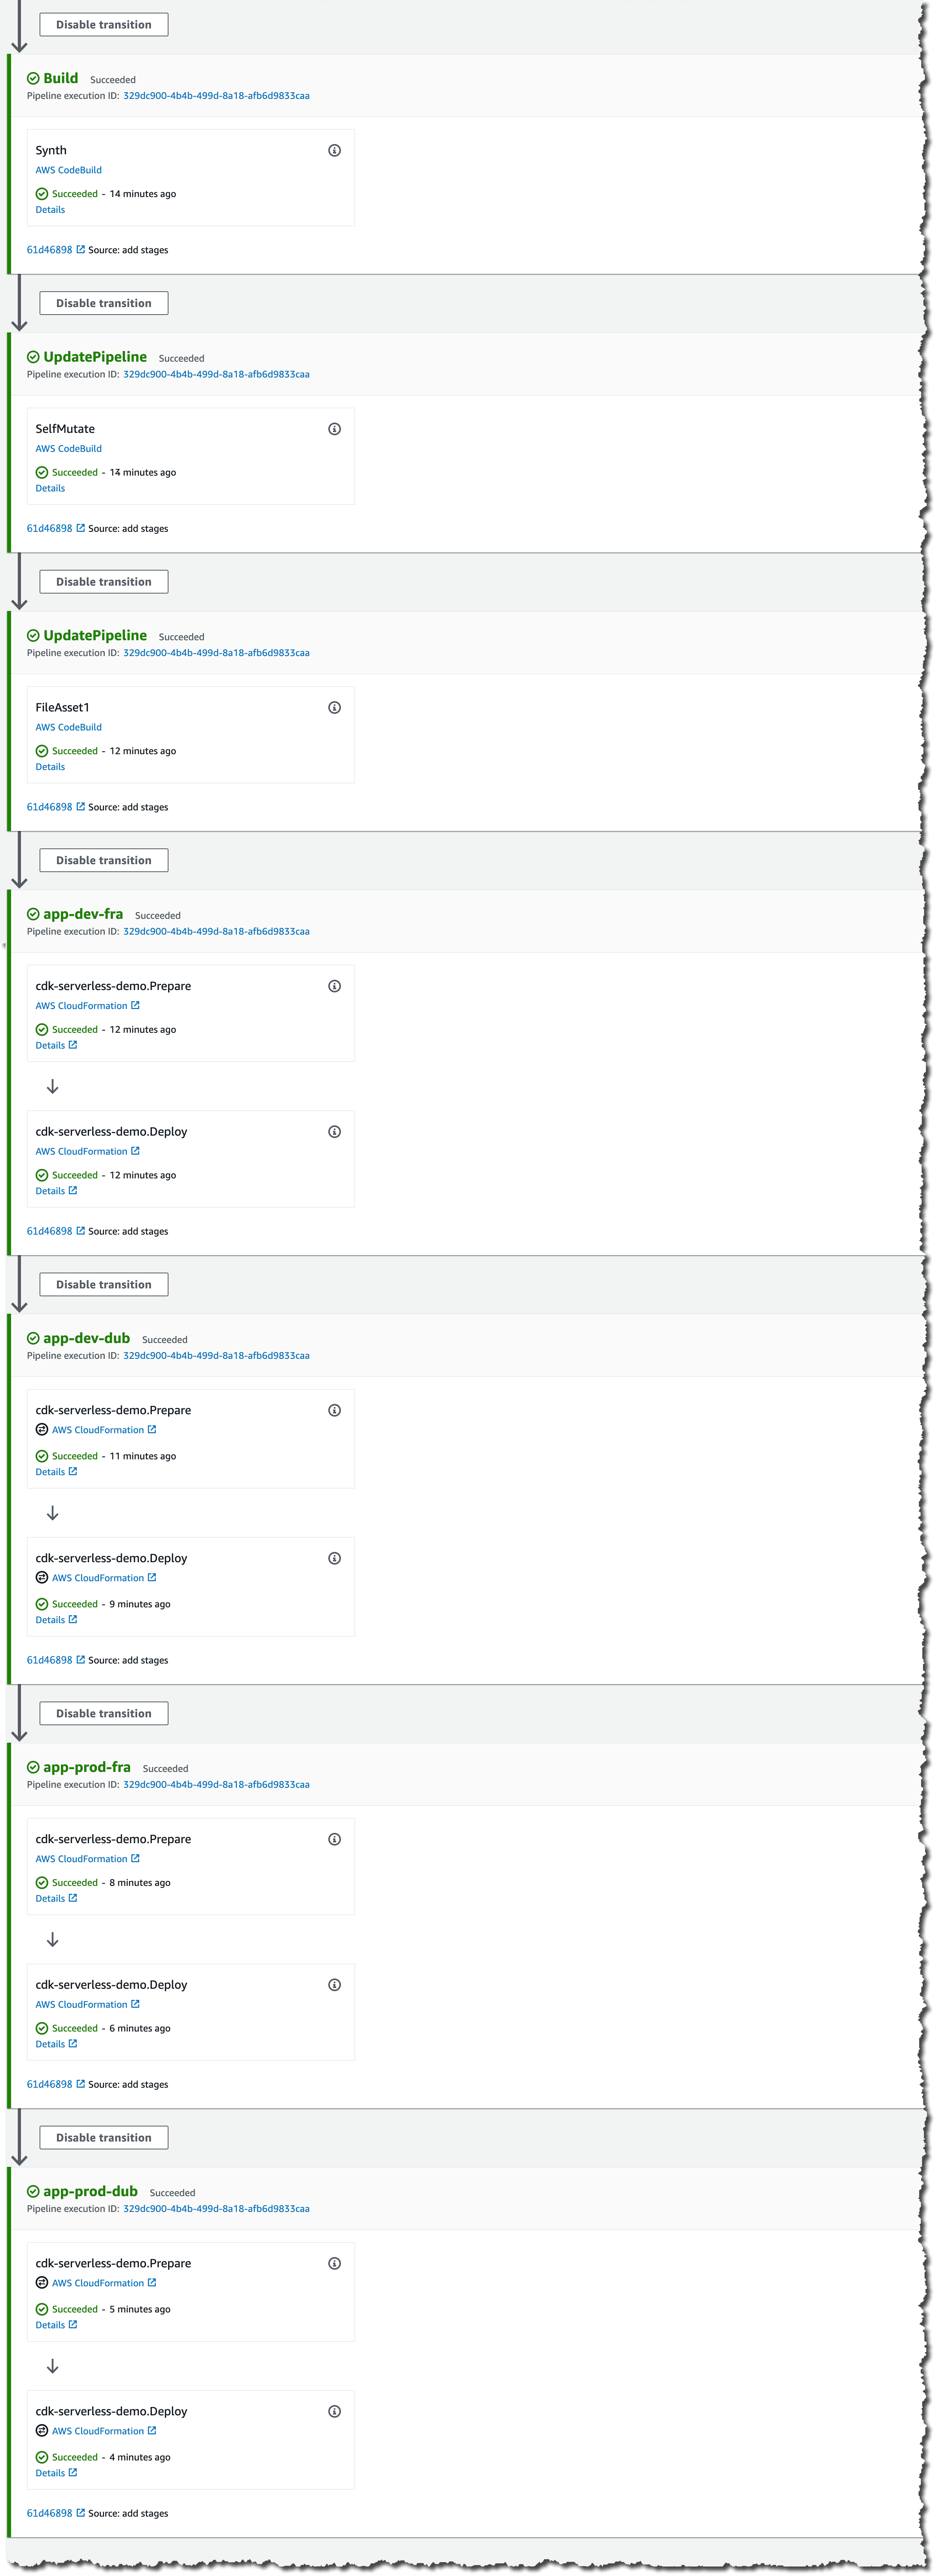 | As you can see the pipeline deployed four environments of our serverless application into two different accounts and two different regions. In total, we deployed six CloudFormation stacks:
|
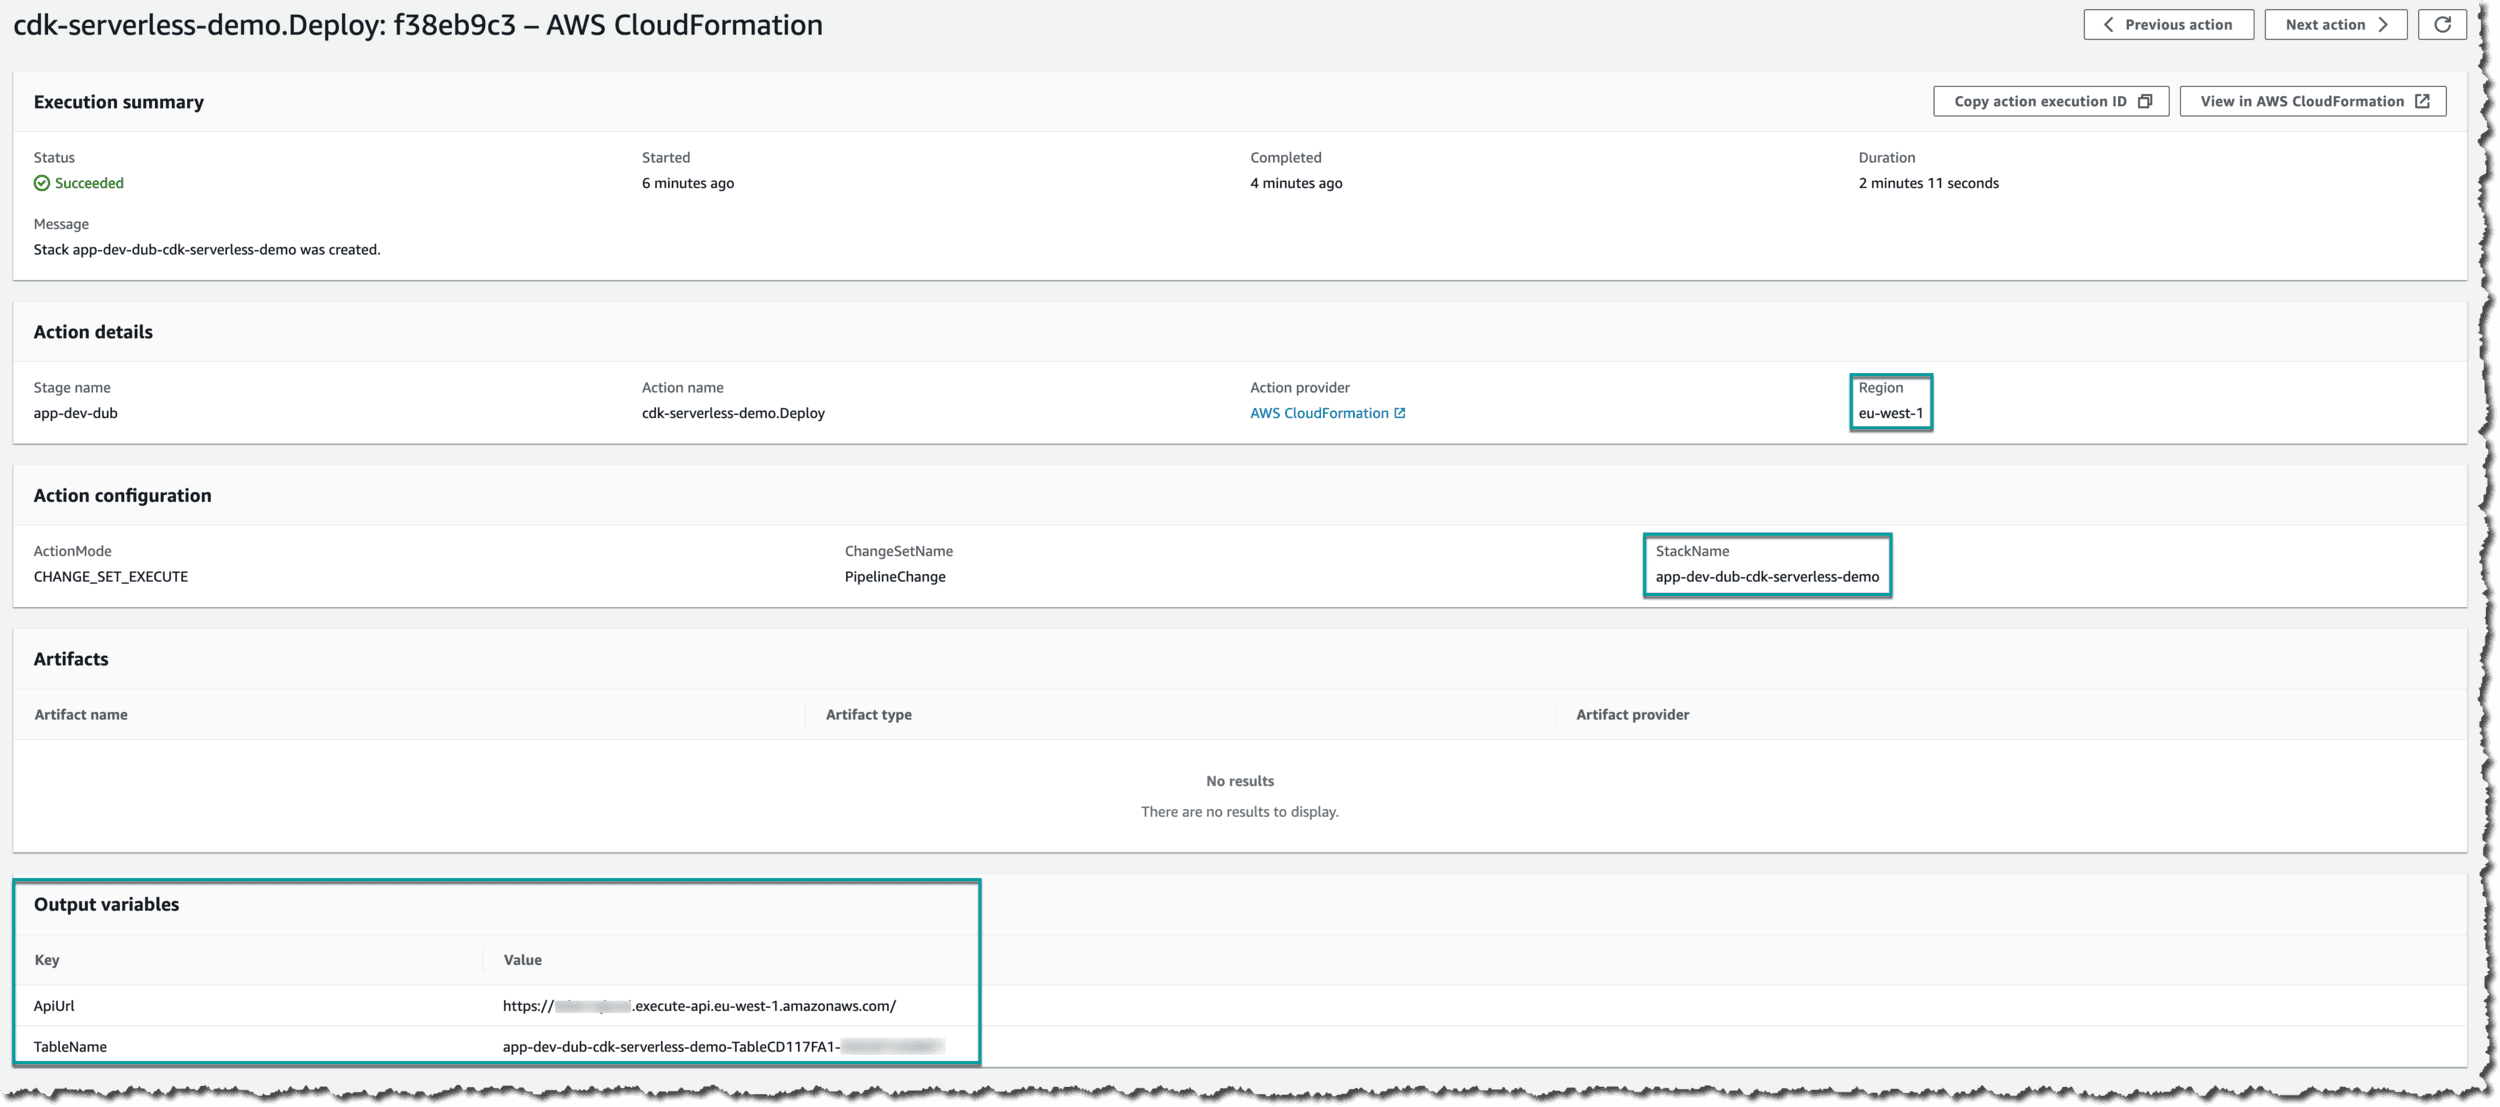
To get the URLs of our stages we look into the CloudFormation outputs of our deployments. You can access them through the execution details of the action or using the CloudFormation console of the target account.
What's next?
The next steps would be to add manual approval actions to ask humans if the pipeline should proceed from one stage to the next one, or to add integration tests that automatically test the deployed stage before proceeding to further environments.
DO YOU NEED HELP SETTING THIS UP? DO YOU WANT TO LEARN MORE ABOUT CDK AND HAVE SOMEBODY TO ASK ALL YOUR QUESTIONS?